2021 Motto: Eat More Cake

So, we already know that 2020 was a crazy/emotional ride on the hot mess express. While I would love to say 2021 has been “soooo much better already” I can’t. Since I cannot control the world, I should just control the things around me. So, I am taking a most serious vow to eat more cake in 2021 and I think you should join me! To get started, I am rolling out the red carpet for a Valentine’s Day treat that may become a problem. And by problem, I mean you may eat the whole cake at once. You’re welcome 😊

Here is what you will need:

FOR THE CAKE

1 and 3/4 cups all-purpose flour

3/4 cup unsweetened natural cocoa powder

1 and 3/4 cups granulated sugar

2 teaspoons baking soda

1 teaspoon baking powder

1 teaspoon salt

1/2 cup vegetable oil (I used coconut oil but you don’t have to… BUT YOU SHOULD)

2 large eggs, at room temperature

1 teaspoon pure almond extract

1 cup buttermilk (2% with a little lemon juice in it works too)

1/2 cup freshly brewed strong hot coffee

1/2 cup maraschino cherry juice

1 full jar of maraschino cherries halved or quartered

FOR THE GLAZE

4 oz of semi sweet chocolate

1/2 cup heavy cream

1/4 teaspoon almond extract

Now what do you do?

CAKE

  1. Preheat oven to 350°F. Here is where it gets a little tricky. I used aheart shaped mini-cake pan. However, you may use whatever pan you like. The time for this recipe is for a standard, two later 9” cake, So grease your pan(s), line with parchment if that is your thing, then grease the parchment paper. Parchment paper helps the cakes seamlessly release from the pans.
  2. Whisk the flour, cocoa powder, sugar, baking soda, baking powder, and salt together in a large bowl. Set aside.
  3. Using a whisk (handheld, manual or mixer) mix the oil, eggs, almond and cherry juice together on medium-high speed until combined. Add the buttermilk and mix until combined.
  4. Pour the wet ingredients into the dry ingredients, add the hot coffee, and whisk or beat on low speed until the batter is completely combined. Fold in cherries.
  5. Pour batter into pans, making sure it is even. Bake for 20-25 minutes or until a toothpick inserted in the center comes out clean. You can also just tap the top of the cake, if your finger springs back it is done. Baking times vary by pan/oven, so start with 20 minutes and go from there.
  6. Allow cakes to completely cool in the pan. If you need your cake same day, refrigerate AFTER THE CAKE HAS COOLED in the fridge for 30-45 minutes. This helps create more structure to the cake when it comes to slicing. If you don’t need your cake the same day, wrap up your cake and store in a cool dry place to frost 1-2 days later*

*Cake naturally taste better the next day after it is baked. This allows time for all of the flavors to really set in. If you haven’t done this before, I suggest it and you can thank me later 😊

GLAZE

  1. Place chocolate in medium bowl, set aside
  2. Bring milk to a gentle boil, stirring occasionally
  3. Pour hot milk into chocolate, add almond, stir until silky smooth
  4. Drizzle or pour over your cake

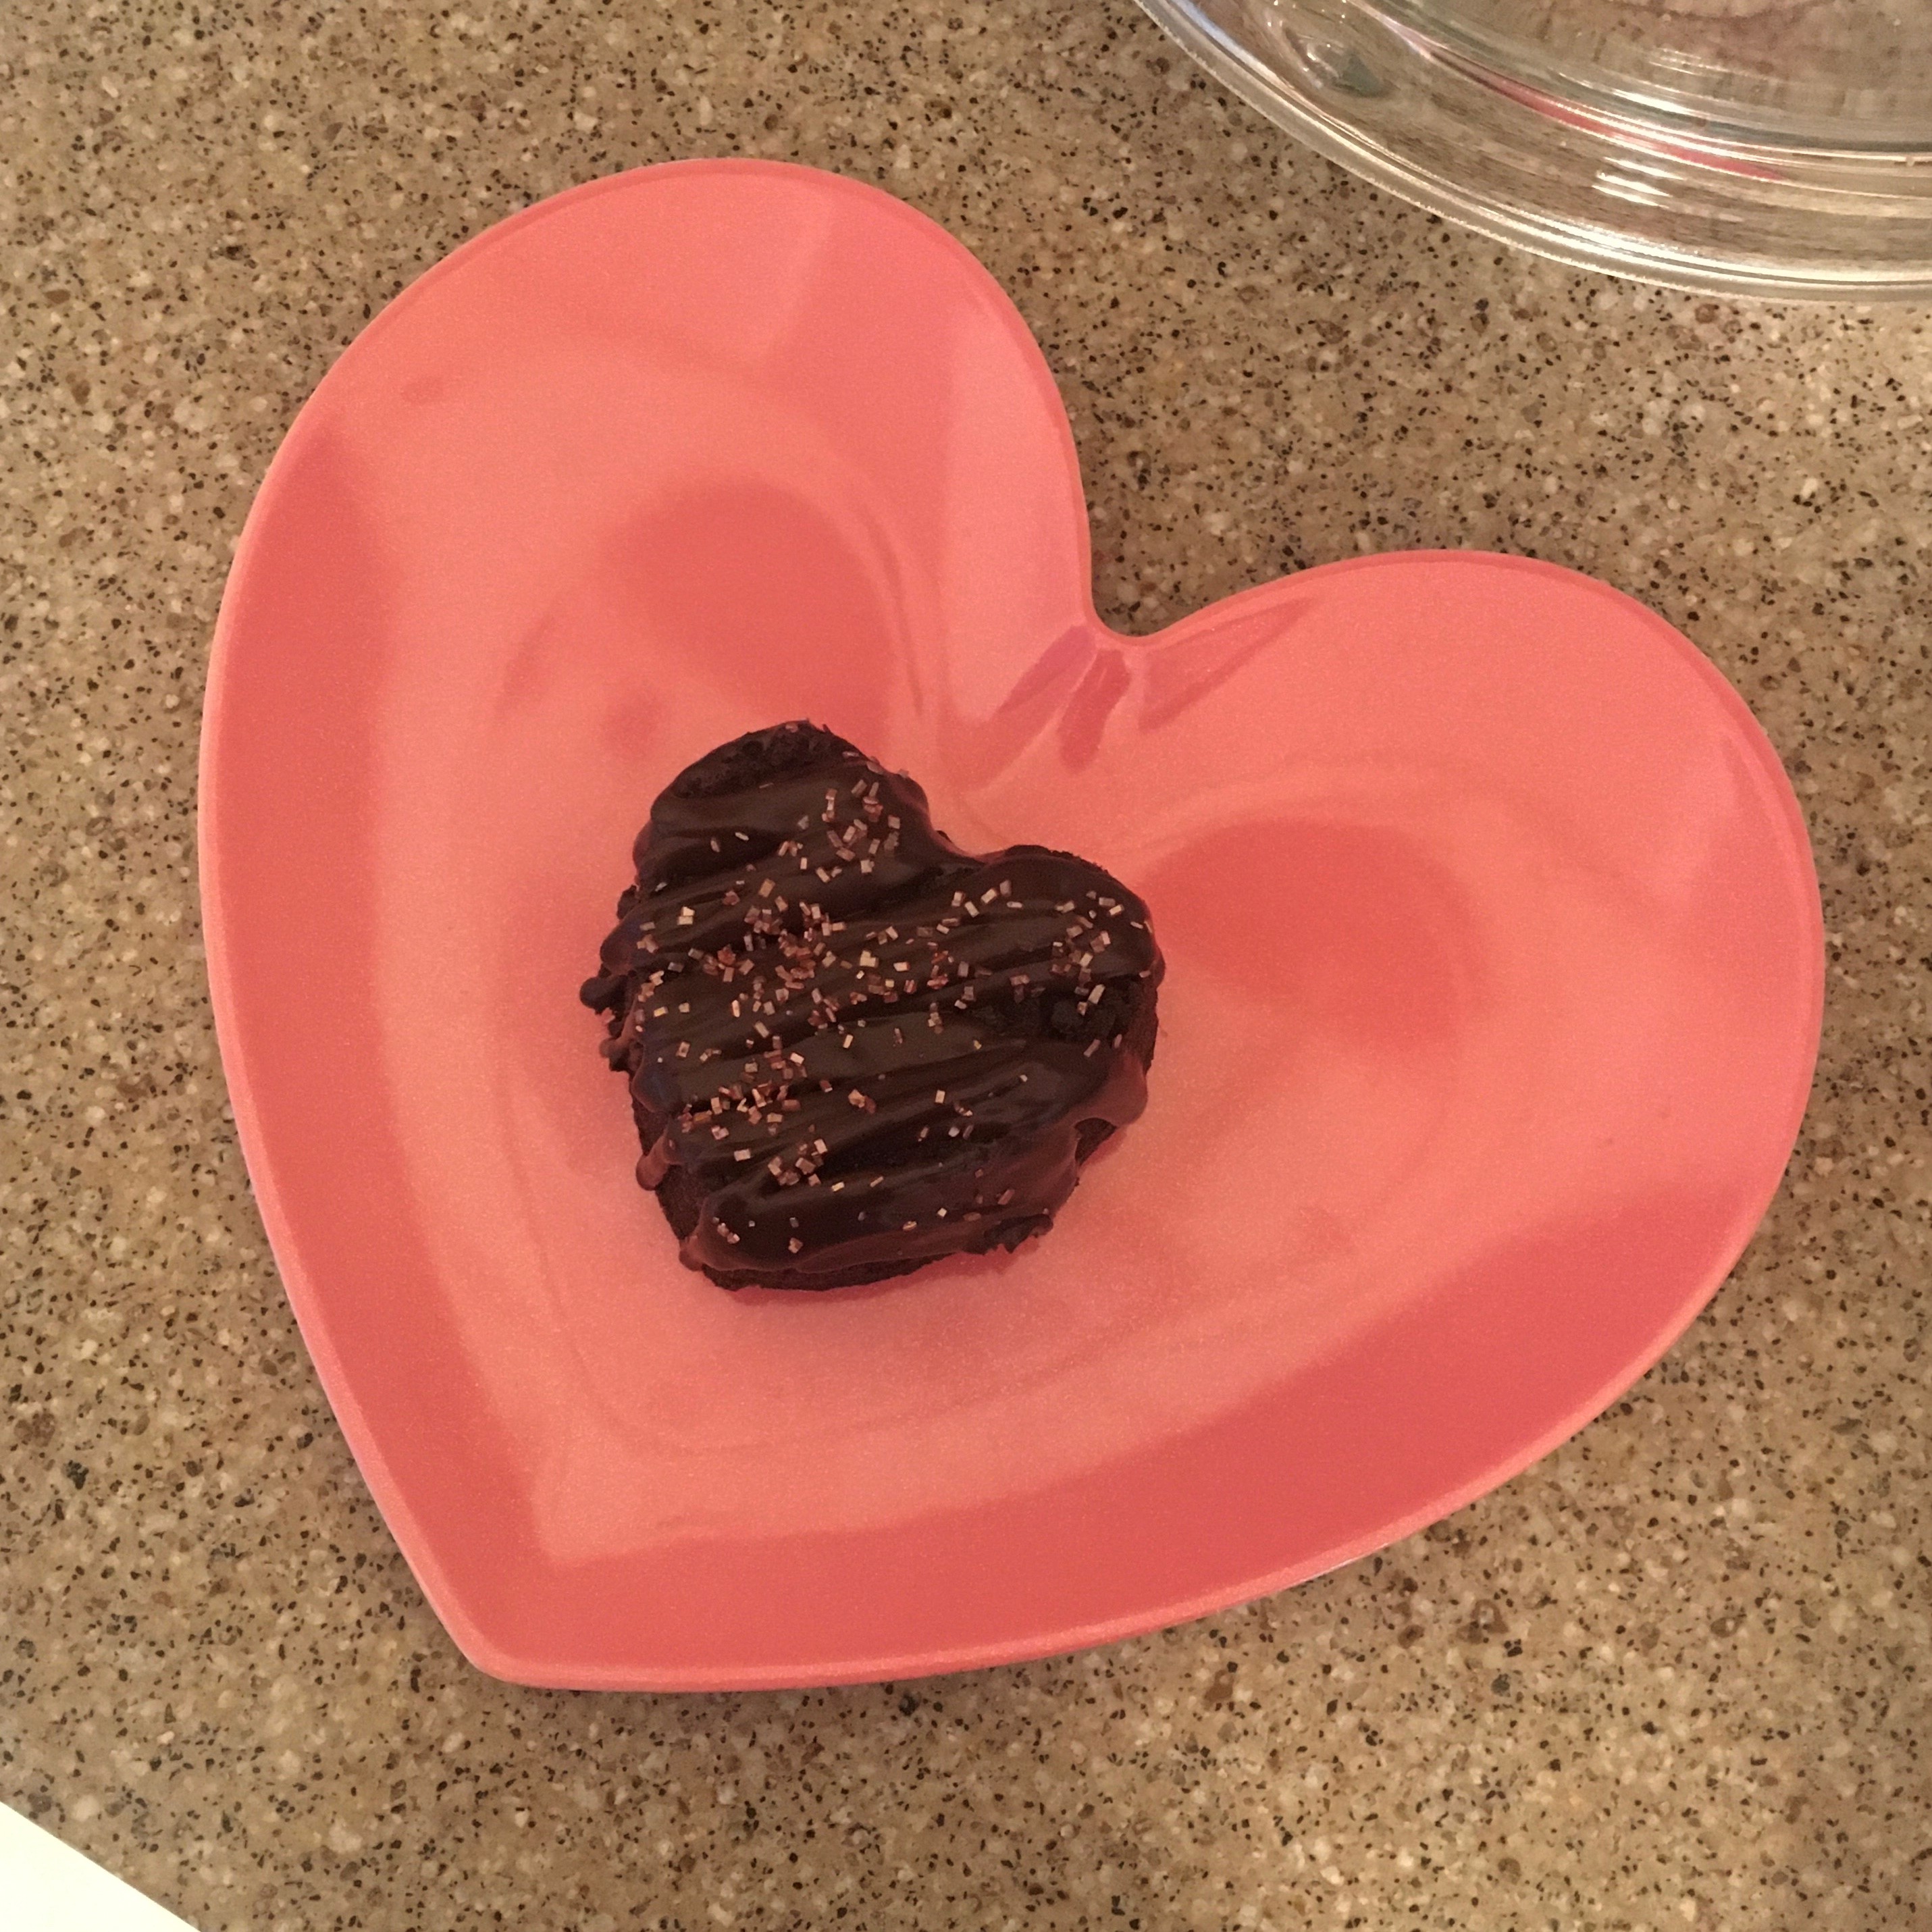
You may garnish your cake(s) with anything you like. I let the kids add sprinkles, but you could top with more maraschino cherries or even a cordial cherry. If you don’t like cherries, you can sub in really any kind of fruit you want. Strawberries would be great! I would change the almond extract to vanilla in both the cake and glaze and instead of using cherry juice in the cake, you can use more coffee. The options are endless and this cake is incredible. Cheers to more cake in 2021!

…Samantha?

This Holiday season came with it’s fair share of ups and downs. Holidays are tough with small kids. They understand the general idea of Santa and presents, but don’t understand that “No, we don’t get to open presents every time we wake up” and “No, just because we had a fancy breakfast on Christmas morning does not make that the new normal.” Also, if you have kids that normally nap in the middle of the day… THEY NEED THAT NAP STILL. 😊 Learned that the hard way.

But aside from all the difficulties of parenting during this crazy time of year, there is something magical that happens when you have kids during Christmas. The spark of joy in their faces as they play with their cousins, or open a new toy, is really something special. Hearing your kids yelling from their room (because they are still trapped in their cribs, thank you Lord) “is it Christmas day yet?!” is just one of my favorite things. All the hard work, time, and money put into everything is finally about to happen.

So, before I get into what this post is really about (FOOD) I just want to list off the things that I am grateful for this Holiday season:

  1. A supportive spouse
  2. Family that understands your needs, and not being afraid to ask for help
  3. Unconditional love and forgiveness from God
  4. The innocence of childhood
  5. Wine/Sangria/Stout Beer/Secret Kitchen Eggnog/Secret Bailey’s in your coffee (DON’T JUDGE ME)
  6. Sleep (when you can find it)
  7. Delicious treats.

This recipe was created while I was playing around with an old one. I love a good quick bread and the idea came to me that I really wanted something light and tart, with a crispy sweet finish. When my daughter showed hesitance in trying it, I just told her the clear crispy “ice” topping was because Elsa helped me bake it.

What you’ll need:IMG_8405

  • 1/3 cup butter, melted
  • 1 cup sugar
  • 3 tablespoons lemon juice
  • 2 large eggs
  • 1-1/2 cups all-purpose flour
  • 1 teaspoon baking powder
  • 1/2 teaspoon salt
  • 1/2 cup milk (I generally use 2% or whole milk for baking)
  • 1 cup frozen blueberries
  • 2 tablespoons grated lemon zest (optional)IMG_8409

GLAZE:

  • 2 tablespoons lemon juice
  • 1/4 cup sugar

Now what do you do:

  1. Preheat oven for 350°
  2. In a large bowl, beat the butter, sugar, lemon juice, and eggs.
  3. In a second bowl, combine the flour, baking powder, and salt;
  4. Stir dry mix into egg mixture alternately with milk, beating well after each addition.
  5. Fold in the blueberries. You’ll want to coat them in flour before, so they don’t sink to the bottom while baking.
  6. Transfer to a greased 8×4-in. loaf pan. Bake 60-70 minutes or until a toothpick inserted in the center comes out clean.
  7. Cool for 10 minutes before removing from pan to a wire rack.
  8. Combine glaze ingredients; drizzle over warm bread.
  9. Cool completely.

IMG_8422

If you have made it to the end of this post and are still really confused by the title, it’s time for you to go see Frozen II. We did, with 3 kids under three..on Christmas Day. Are we crazy? Yes. Did they love it? Yes. Was I dancing in the aisle with a 3-month-old fussy baby strapped to me for half of the movie? Also, yes.

SHOUT OUT TO AUNT KELLY AND UNCLE JOHN FOR HELPING US WRANGLE THOSE KIDS IN THE THEATER. Memories made.

Third Pregnancy Reflections: Cookies are Therapeutic

This post may have a bit of a different tone than all the others (don’t worry there’s still a recipe down below 😊). But I feel this is a perfect platform to fully share my feelings on having multiple pregnancies, while trying to pursue my baking hobby and continue to find myself in my role as a mommy. Also, sis needs to vent. Baking full time will always be a dream of mine, but life has handed me wonderful little babies that take up 90% of my time (let’s be real, it’s more like 100%). So, for now, baking is a hobby.

When I had my first baby, I thought life would just bounce back and I could get back on track to achieving my goals. WOAH were my expectations for myself crazy. Ultimately, I set the bar WAY too high and fell into deep postpartum depression and anxiety. I thought I should be able to do it all, lose the weight, keep taking on baking jobs while working full time in my daytime job, and make sure my house was always perfect. Because Pinterest is life and I should be able to look like everyone on social media, right? RIGHT?!? But there was this beautiful little angel staring back at me every day, how could I feel this way? Everyone will tell you to just let the little things slide and focus on what is important, but what if you can’t? I was mentally and often physically crippled by the weight of it all.

**Here’s where I tell you I literally thank God every day for my patient husband**

My second baby saved me. I discovered her only 4 months postpartum from my first. I was terrified and angry. On top of that, the guilt that my first baby wouldn’t get all the attention I thought I would give her really weighed on me. Now, back to that saving me part? Becoming pregnant so quickly after my first quite literally saved me from continued months of depression. That hormone surge just evened me right back out. I was ultimately able to enjoy that new little baby growing inside me. Which was wonderful because she ended up just being a little bundle of pure joy. She fights hard, but she loves even harder.

Fast forward just 10 short months and BAM, another pregnancy. This one came to us as even more of a shock than the second. Ultimately, come September I will have had 3 babies in 2.5 years AND IT IS NO JOKE. I have Hyperemesis (essentially constant nausea and vomiting through the WHOLE pregnancy), I have torn multiple ligaments, been hospitalized, received multiple IV treatments, and suffer from vertigo. Also, just… everything hurts… all the time. But, pregnancy is beautiful right? HA!

**Here’s where I tell you again I literally thank God every day for my patient husband**

Also, with each pregnancy, the loneliness is REAL. To no one’s fault, family and friends ultimately show less and less interest when you keep having more babies. They tend to think you have it all together and may not realize you’re screaming on the inside (sometimes on the outside too). It may not help that every time someone asks how I am feeling I say, “Like shit!” 😊 I’ve slowly learned that sometimes honesty isn’t the best. Between working full time and taking care of my little ladies, I’ve hardly had time to focus on myself. When I do have a moment and everything catches up to me, I cry. Not always because I am sad, but sometimes because I can’t wait to meet this little man and I have NEVER been more hormonal.

I’m not writing all of this for sympathy, but because maybe there is a mom out there on her first, second, third or fourth baby that needs to hear this. It’s ok to feel “like shit.” It’s ok to not feel beautiful or graceful during your pregnancy. IT’S SO HARD. But, you are doing a great job! Because at the end of the day, if everyone is still alive… you did it! In all seriousness, the physical and mental demands of being pregnant are so different for everyone. We all require different things to help us get through it. For me, it’s a moment alone to bake. That’s when I feel most like myself again. Also, cookies really make everyone feel better. So, if you are a mom (or just someone in need of a pick-me-up) and are reading this, find a moment and make these cookies. Then, eat these cookies… ALONE. Take a breath and enjoy them. Even if your alone time also happens to be shower time? Great. Hiding in a closet for 30 seconds? Been there. Turning the music up in the car while the kids scream in the back? Yep, that’s a great time.

What you’ll need for these magical therapy cookies:

  • 1/2 cup unsalted butter (melted)
  • 1/2 cup creamy peanut butter
  • 1/4 cup granulated sugar
  • 2/3 cup brown sugar
  • 1 teaspoon vanilla extract
  • 1 egg
  • 1/2 teaspoon baking soda
  • 1/2 teaspoon salt
  • 1 3/4 cups all-purpose flour
  • 1 1/2 cups chocolate chips

Now what do you do:

  1. Mix melted butter with peanut butter until smooth.
  2. Add brown sugar and granulated sugar. Mix until creamy.
  3. Beat in vanilla, egg, baking soda, and salt.
  4. Mix in flour slowly until cookie dough forms.
  5. Stir in chocolate chips.
  6. Scoop 2 tablespoon sized cookie dough balls onto cookie sheets covered with parchment paper.
  7. Chill 30 minutes.
  8. Preheat oven to 350°F.
  9. Press cookie dough balls flat with the tines of a fork.
  10. Bake cookies for 8-12 minutes, or until slightly brown on the bottom and the top just loses the wet cookie dough look. This is crucial, you want to slightly under-bake these.

I hope that by airing all of this, someone out there feels a little bit better or more empowered to embrace the chaos. Come, join me!

Also, these cookies are delicious.

Peanut Butter Chocolate Chip Cookie
My glamorous moment alone was at work, headphones on, eating a cookie out of a plastic bag 🙂

What will the kids eat? Dessert.

I ask myself this question every day around 4pm. Right when I am about to get ready to leave work. It’s hard coming up with meals that 2 adults, a 2 year old, and a 1 year old will all eat together. Often, I find myself making the kids something else. Which ultimately takes time away from playing with them. Luckily the littlest lady is (mostly) still down with eating anything you put in front of her. She hasn’t hit the “yucky” phase of meals yet. I try to introduce my older daughter to new things all the time, but let’s face it… if it even looks weird, she isn’t eating it.

Some nights I really dance around to get her to try new things. But as I have another little one growing bigger and bigger in my belly, my determination for that is dwindling. One thing that helps is having a (somewhat) healthy meal/dessert on standby. Having a list of recipes that are quick and always a homerun makes life SO much easier and allows me to spend more time with my kids after work. So, sometimes… that means dessert for dinner.

Now I know what you are thinking… dessert… really? Well life is short people, and if I can try and fill my kid’s bellies with something SOMEWHAT substantial I call that a win. The process is time consuming, often I fail, but eventually we have a list of meals that the kids will eat and go to bed without asking for something more. Here’s where protein pancakes come in… and they are technically a breakfast food 😊

What you’ll need:

  • 1-3/4 cups all-purpose flour
  • 1/2 cup Oats (quick or old fashioned, uncooked)
  • 2 teaspoons baking powder
  • 1/4 teaspoon salt
  • 1-1/4 cups fat-free milk (or any kind of milk you like)
  • 1-2 eggs, beaten (your choice, pancakes will be denser with 2)
    • If using 2, add more flour or oats to the mixture so it isn’t too runny
  • 1 Banana (smashed)
  • 1 tablespoon vegetable oil or butter… I always use butter. Real. Butter.
  • 2-4 tablespoons of peanut butter (I actually use PB2 powder)
  • Optional Add-ins: blueberries, apples, peanut butter, protein powder, etc.

Now what do you do:

  1. Combine flour, oats, baking powder and salt; mix well.
  2. In separate medium bowl, combine milk, egg, banana and butter/oil; blend well.
  3. Add liquid ingredients to dry ingredients all at once; stir just until dry ingredients are combined (do not over mix).
  4. Add one of the stir-in options, if desired.
  5. Heat skillet over medium-high heat & lightly grease with butter.
  6. For each pancake, pour 1/4 cup batter into hot skillet.
  7. Turn when tops are covered with bubbles and edges look cooked. Turn only once.
  8. Serve with syrup & enjoy!

Now, I would love to say this recipe is always a home run. It is delicious, but nothing is ever always a home run with toddlers. In fact, my plan to take cute pictures of my kids enjoying these pancakes completely failed. Both kids didn’t nap yesterday, so they SCREAMED their way through dinner. Then, since I am 6 months pregnant, I started to overheat from cooking and had to lay down while my husband finished feeding them. The screaming ensued for my littlest through bath time, singing, attempted story time, and FINALLY bedtime. I’m exhausted just thinking about it again.

So I gave up the idea of pictures and moved on…

My favorite thing is how diverse this recipe is. You can substitute all kinds of fruit and even throw a little cream cheese icing drizzle on there! Hopefully you can enjoy this pancakes scream free, maybe even in… silence?!

Hot Chocolate Therapy

I preface this recipe with a story of regret:

I began my journey thinking I was going to make a super old school recipe I had for Blueberry Muffins. TERRIBLE IDEA. They were disgusting. Maybe I over-mixed? Not enough sugar? Should I have added apple sauce? I have no idea where I went wrong and quite frankly, I have put the nail in that coffin.

When it comes to muffins I need to stick with my own recipes. I have spent years trying new ways of making them and honestly, I‘m good at what I already know.  In any case, I was pretty upset. I made a delicious streusel topping and was so excited to share these muffins with my kids (they are muffin addicts). Unfortunately, I had failed. I actually get pretty down on myself when I don’t produce something delicious.

So I sat and stewed for a few days. I decided I didn’t want to try and redeem myself with another muffin recipe. I (GASP) bought muffins from the store. I KNOW. But I was desperate. Have you ever tried to go days telling a toddler over and over again “WE HAVE NO MUFFINS!”

A few days later I had a revelation.  What makes everyone happy? Chocolate. What is better than just chocolate? Chocolate mixed with sugar, love, warmth, and sometimes a little something extra.

What you’ll need:

  • 1/2 cup sugar (less is fine too if you are looking for a semi-sweet option)
  • 1/4 cup baking cocoa
  • Dash salt
  • 1/3 cup hot water
  • 4 cups milk (I prefer 2% or Almond)
  • 1/2 teaspoon almond extract
  • Something Extra: Miniature Marshmallows/Whipped Cream/ Bailey’s/ Bourbon/Sanity

Now what do you do:

  1. In a medium saucepan combine sugar, cocoa, and salt.
  2. Add water and bring to a boil.
  3. Lower heat to medium, cook, and stir for 2 minutes.
  4. Stir in milk and heat to serving temperature (do not let it boil).
  5. Remove from the heat and stir in almond extract.
  6. Whisk until frothy.
  7. Serve with your favorite garnish or spirit 🙂


Ugh, thank you Baby Jesus for chocolate. Chocolate never fails me. He never lets me down (chocolate is a he right?).  He never leaves me hanging. By all means, Chocolate is very loyal. Let us not forget another big star in this show, Almond Extract. You can try this recipe with Vanilla but… IT. IS. NOT. THE. SAME.

Ok, rant over. 🙂

Now go enjoy yourself some Hot Chocolate!

hc1

Snowstorm Snugglemuffins

What is the best thing to eat after a snowstorm? TRICK QUESTION! Everything is the best thing to eat after a snowstorm. It is winter and time to hibernate. I am partial to a good muffin or quick bread to snuggle up to. My daughter constantly asks for muffins, so this weekend I decided to scrounge up what I could find around the pantry and surprise her after a nap. The outcome was delicious and we are still reaping the benefits days later, though I am not sure how much longer these will last.

What you’ll need:

ingredients2

  • 1 3/4 cups flour
  • 3/4 cup sugar
  • 1/2 cup dark brown sugar
  • 1 teaspoon baking soda
  • 1/2 teaspoon salt
  • 2 teaspoons cinnamon
  • 1/2 teaspoon pumpkin pie spice
  • 2 eggs
  • 1- 15 ounce can pure pumpkin puree
  • 1/2 cup coconut oil, melted
  • 1 teaspoon vanilla extract


Pro Tip: Sift your flour (and any other spices/baking soda along with it) at least once for a fluffier muffin. I often sift twice 🙂

ingredients

Now what do you do:

  1. Preheat the oven to 375 degrees and place 12 paper liners into a standard muffin pan.
  2. Combine flour, sugars, baking soda, salt and spices in a medium bowl and whisk together.
  3. In another bowl, whisk together the eggs, pumpkin puree, coconut oil and vanilla extract.
  4. Pour the wet ingredients into the dry ingredients and stir together. Stir until everything is just incorporated, not over-mixed.
  5. Fill each baking cup with 1/4 – 1/3 cup batter, you will use all of the batter for 12 muffins. They will be nearly full.
  6. Bake your muffins for 20-22 minutes. You can check by inserting a toothpick into the center of a muffin, if it comes out clean they are ready! Remove from pan immediately to cool.


These muffins are so moist (sorry, I know that worst triggers people) and are served best with a little cinnamon and sugar butter. Bonus points if you have a little mulled wine or spiked cider to go with. I paired mine with some maple pecan coffee because drinking before 9 in the morning is generally frowned upon. Honestly, the peace and quiet while my daughter wolfed these down was worth more than any spirited drink.

Lasagna Rollin’ Rollin’ Rollin’ Rollin’-Ups

Another day, another (terrible attempt at a mom joke with the title) quick dinner recipe!

I know… I need to stick to what I know and get back to baking. I promise I am and I have some fun things coming up! But until then, I am going to keep sharing “dinners my toddler will eat more than 2 bites of (sometimes) and don’t take hours to make.”

This one sort of came about because I didn’t feel like making a full lasagna. Ugh, so much work and so heavy. I also did NOT feel like waiting an hour for this to cook. The truth is I have a 30-45 minute window in-between the time I get home from work and when I need to leave to pick up my girls. I used to feel guilty and thought I needed to rush to pick them up. But, then when I got home I was juggling hungry screaming kids and no dinner prepared. In a state of panic, I’d be forced to sprinkle cheerios/veggie straws/random crackers from my pocket in front of our 9 month old (Hulk smash for real when that one is hungry) and then I’d throw some chicken nuggets and cheese at my toddler and wonder why she was so gassy all the time (TRUTH).

Looong story short, I’ve been working on dinners I can either cook to entirety, or at the very least get prepped in that precious window of time. Now by the time daddy gets home we don’t have to try to eat while acting as human jungle gyms. How can something so small be so strong?!

What you’ll need:

  • 12 Lasagna noodles, cooked
  • 2 containers of Ricotta cheese (15 oz)
  • 2 large eggs
  • 2 cups Mozzarella cheese
  • 2 cups shredded Parmesan cheese
  • 1-2 Tbsp olive oil
  • 4 Tbsp fresh basil, chopped
  • 4 Tbsp fresh Italian parsley, chopped
  • 2 garlic cloves, minced
  • ½ medium onion, diced
  • 1 can diced tomatoes, undrained (14.5 oz)
  • 1 can tomato paste (6 oz)
  • 1 cup chicken or vegetable broth
  • Salt and Pepper to taste

Now what do you do:

  1. Preheat oven to 375 degrees.
  2. Cook noodles as directed on package.
  3. Sauce Directions: (Totally cool to just use the jarred stuff too!)
  • In a medium sauce pan add 1 Tbsp olive oil.
  • Next, add 2 Tbsp basil, 2 Tbsp parsley, and onion. Cook until onion is just soft.
  • Add diced tomatoes, paste and broth. Heat until combined.
  • Add salt & pepper to taste.
  1. In a medium bowl, mix ricotta, eggs, remaining herbs, and half the amount of cheese in a bowl.
  2. Spread half of the tomato sauce in a 13×9 inch baking dish.
  3. Lay out lasagna noodles one by one, spreading 1/4 – 1/3 cup mixture across each and rolling up.
  4. Place seam side down on sauce in dish, about 6 in each row.
  5. Evenly distribute remaining sauce, and then sprinkle the rest of the cheese on top.
  6. Bake for 20 minutes, covered in foil. Followed by 5-10 minutes uncovered to brown the cheese.
  7. Let sit for 10 minutes before serving, so everything sets.
  8. Enjoy! We paired ours with turkey Italian sausage & peppers, since our roll-ups are meatless. You can also add all kinds of vegetables as well.

Lasagna Roll Ups!

Once again, this dinner was a hit. Well, for my husband at least. Never know what the toddler will or won’t accept as dinner.  The good news is, this was so east to make I don’t take it personal if she doesn’t eat it AND I get to have more leftovers for lunch 🙂

My Happy Accident: Creamy Sun Dried Tomato Chicken Pasta

So, a very fun thing happened last night. I kind of screwed up a recipe and it turned into something delicious! I tried to take a slow cooker recipe and make it in the oven. However, I kind of forgot to cut the liquid in half and ended up with really saucy chicken. What was I to do? Well, I am a firm believer in adding carbs to meals. So I tossed in some noodles and cheese and saved this dish! In fact, I think I created something even more delicious than the initial recipe called for.

What you’ll need:

  • 5 Chicken Thighs (this recipe can also be made with 3 chicken breasts, if that’s your thing)
  • ¼ cup flour
  • 1 teaspoon salt
  • ½ teaspoon pepper
  • 4 Tablespoon olive oil
  • 1 ½ cups chicken broth
  • ½ cup sun dried tomatoes in olive oil
  • 2 Tablespoons basil
  • 4 cups egg noodles
  • 1 cup shredded Mozzarella cheese (provolone would also work 🙂 )
  • Red Pepper Flakes to taste (optional)

Now what do you do:

  1. Spray a large casserole dish with cooking spray and preheat the oven to 350 degrees.
  2. Heat a large skillet over medium high heat. Add olive oil.
  3. Combine flour, salt, and pepper. Dredge chicken thighs in flour mixture and place in skillet. Brown chicken on each side for 2-3 minutes and place in casserole dish.
  4. Add chicken broth, sun dried tomatoes, and basil to chicken, cover.
  5. Cook chicken for 30-45 minutes, or until cooked through.
  6. Cook egg noodles and set aside (I added a little butter to the noodles so they didn’t start to stick).
  7. When chicken is cooked, pull thighs out of casserole dish and pull the chicken off the bone.
  8. Add cooked noodles, heavy cream, and cheese to the sauce in casserole dish.
  9. Stir until cheese is melted and combined (or in my case, feverishly mix and spill everywhere because you are trying to get dinner ready for your screaming toddler)
  10. Stir in chicken and let sit for 5-10 minutes before serving, so the sauce thickens.

I call this my happy accident because when my daughter ate it, for the first time ever, she said “WOW!” Any home cooked dinner approved by a toddler is worth more than gold. So Mamas, try this one out if you have a picky eater!

Every day as a mom of 2 under 2 is a new adventure and being able to cook for my family gives me great pleasure most nights. Other nights end in me giving my daughter 4 Hawaiian rolls, oranges, and cheese because she has decided to only eat things that are orange 🙂

Here is another really fancy picture of me finally enjoying this meal at work the next day!

Creamy Sun Dried Tomato Chicken Pasta
The Styrofoam bowl and plastic fork give it a little something extra ;-P

Easy Peasy Sweet & Sour Chicky

It has been a year and half since I last posted. These two little nuggets might have something to do with that 🙂

IMG_5386

In any case, I have always been looking for quick and easy dinner options. Now more than ever I am pressed for time, but still want to provide my family delicious dinners. So, I bring you the easiest homemade sweet and sour chicken on the block! Chances are you have all of these things just sitting around, too!

What you’ll need:

  • 3-4 boneless, skinless chicken breasts
  • Salt and pepper to taste
  • 1½ cup cornstarch
  • 3 eggs, beaten
  • ¼ cup canola oil (or vegetable, even coconut works!)
  • 1 cup granulated sugar (I have also tried this recipe with half the sugar and it tastes JUST fine)
  • 4 tablespoons ketchup
  • ¼ cup white vinegar
  • ¼ cup apple cider vinegar
  • 1 tablespoon low sodium soy sauce
  • 1 teaspoon garlic salt
  • ½ Green Pepper, sliced (optional)
  • ½ Medium Onion, sliced (optional)
  • ½ cup Pineapple, cubed (optional)


Now what do you do?

  1. Preheat oven to 325 degrees.
  2. Cut chicken breasts into 1” cubes (or whatever size you want!)  and season with salt and pepper.
  3. Place cornstarch in a shallow bowl and beaten eggs in another.
  4. Dip chicken into cornstarch then coat in egg mixture.
  5. Heat oil in a large skillet over medium-high heat and cook chicken until just browned.
  6. Place the chicken in a 9 x 13 greased baking dish.
  7. In a mixing bowl, combine sugar, ketchup, apple cider vinegar, white vinegar, soy sauce, and garlic salt. Pour over chicken.
  8. Bake for 1 hour, or until chicken is cooked.
  9. Be sure to stir the chicken occasionally so the sauce is evenly distributed.

There you have it! Super easy, super delicious dinner that my toddler actually ate two full bites of before she started asking for ice cream! I gave her yogurt and said it was ice cream. She’s on to me…

It’s also great as leftovers, here’s a very fancy picture of it in my Tupperware at work 🙂

food

One Pot Cheater Homemade Sauce

Disclaimer: I am NOT Italian. So don’t hate. Now that we got that out of the way 🙂 we can move on.

I love coming up with faster ways to make fresh meals. Lately, it has really taken a lot of planning for me to continue to make dinner 5-6 nights a week. Work is exhausting and baby girl definitely keeps me busy. But I wouldn’t have it any other way. It really is cathartic for me to experiment in the kitchen. It also has always been important for me to keep recipes from our heritage in the regular rotation. Since Sean is both Italian and Irish (Scots-Irish!) I get to make all kinds of fun stuff. It’s super easy to buy a jar of sauce and throw some meat in it. But, it is almost just as easy to make it on your own. Not to mention, less preservatives and sugar! So I came up with an amazing recipe that is both delicious and simple.

What you’ll need:

  • Olive Oil (for pan)
  • 1 Lb Ground Turkey or Beef
  • 1 (24oz) can Crushed Tomatoes
  • 1 (6oz) can Tomato Paste
  • 1 12 oz) can Diced tomatoes (drained)
    • Or two freshly diced tomatoes
  • 1 clove Garlic (minced)
  • ½ Onion (diced)
  • 1 cup Chicken Broth
  • 1 TBSP Italian Seasonings
  • 1 Tsp Garlic Powder
  • Salt and Pepper to taste
  • Red Pepper Flakes for heat

Now What do you do?

  1. Brown meat, onion, and garlic in large potsauce 1
  2. Literally dump everything else in the pot
  3. Simmer 45 min – 1 hr to let the flavors mixsauce 2
  4. Enjoy!

I look forward to sharing more of my simple “cheater” meals. Believe me, I have plenty of them now! **yawns** … **sips wine** 😉

i-cook-with-wine-meme-300x205